2026-09-18
Content
When a teacher wheels a cart of biology models to the front of the lab, the room shifts. Students who struggled to picture a nephron from a textbook diagram suddenly see the loop of Henle in three dimensions. But choosing those models — a 42 cm human skeleton, an enlarged heart, a flower with removable petals — is not about picking the most colorful option. Schools need models that survive years of handling, match the curriculum, and respect a tight budget. Here is what actually matters when buying biology teaching models.
The models that earn their place in a classroom share five traits. Use these as your first filter before comparing prices.
Among those five, material choice drives both cost and lifespan. PVC models are the workhorse of most school labs: they resist breakage, tolerate wiping with mild detergent, and hold paint reasonably well. Resin models show finer detail but chip when dropped, and a chipped resin kidney model means a repair bill that can exceed the original saving. If a model will be handled by a dozen classes each year, choose the tougher material even if it means accepting less intricate paintwork.
Most school biology models fall into four groups, each with its own teaching role.
| Category | Examples | Best for |
|---|---|---|
| Anatomical models | Human torso, heart, kidney, eye, ear | Teaching organ systems and functions |
| Cell and molecular models | Animal cell, plant cell, DNA, chloroplast | Making microscopic structures tangible |
| Plant models | Peach blossom, wheat flower, root cross-section | Botany, reproduction, and plant anatomy |
| Animal models | Rabbit, frog, earthworm, pigeon | Comparative anatomy and life cycles |
Anatomical models get the most classroom time because they turn internal structures into something students can touch and rotate. For circulation lessons, a natural-size heart model with detachable chambers lets students trace blood flow from the vena cava to the aorta step by step. A good heart model also supports quick assessment: ask students to name the chambers and valves on the model, and you will find out quickly whether the textbook has translated into real understanding.
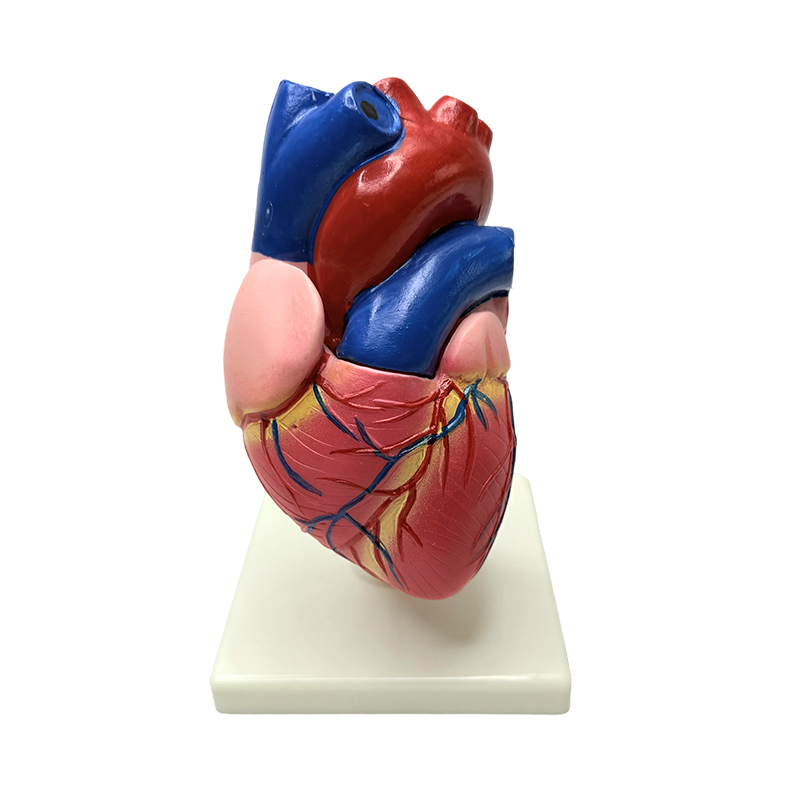 Natural Size Human Heart Model with Detachable ChambersThis 1:1 scale heart model includes major vessels and valves, making it ideal for teaching circulation. Its durable plastic and metal build handles frequent classroom handling and supports hands-on assessment.View Product →
Classroom models are handled hundreds of times a year. They get knocked, stacked, and occasionally dropped from lab benches. Knowing where models fail first helps you choose products that last.
Price often tracks detail, but not longevity. A 42 cm skeleton with simple hinge joints can outlast a finer resin version with delicate fingers — and cost a tenth of the price. Primary and middle school labs should prioritise toughness; upper secondary and university labs can justify finer models because they are handled with more care.
Wear patterns reported by school labs put painted details at the top of the failure list, followed by joints and detachable connections. If your budget allows one premium purchase, spend it on the models your curriculum uses most often, and choose versions with replaceable parts where possible.
Many teachers ask whether physical models are still necessary when free 3D apps keep improving. The honest answer is that each format has a distinct role, and the strongest labs use a mix.
| Format | Strengths | Limitations |
|---|---|---|
| Physical model | Hands-on, durable, no device needed | Cost, storage space |
| Preserved specimen | Authentic biological material | Handling, ethics, storage constraints |
| 3D digital model | Interactive, zero storage cost | Requires devices, lacks tactility |
Physical models keep a clear advantage for cell biology. An enlarged animal cell model is the quickest way to make organelles tangible: students can rotate the model, remove the nucleus, and see how the mitochondria sit in relation to the endoplasmic reticulum — something a flat diagram cannot show.
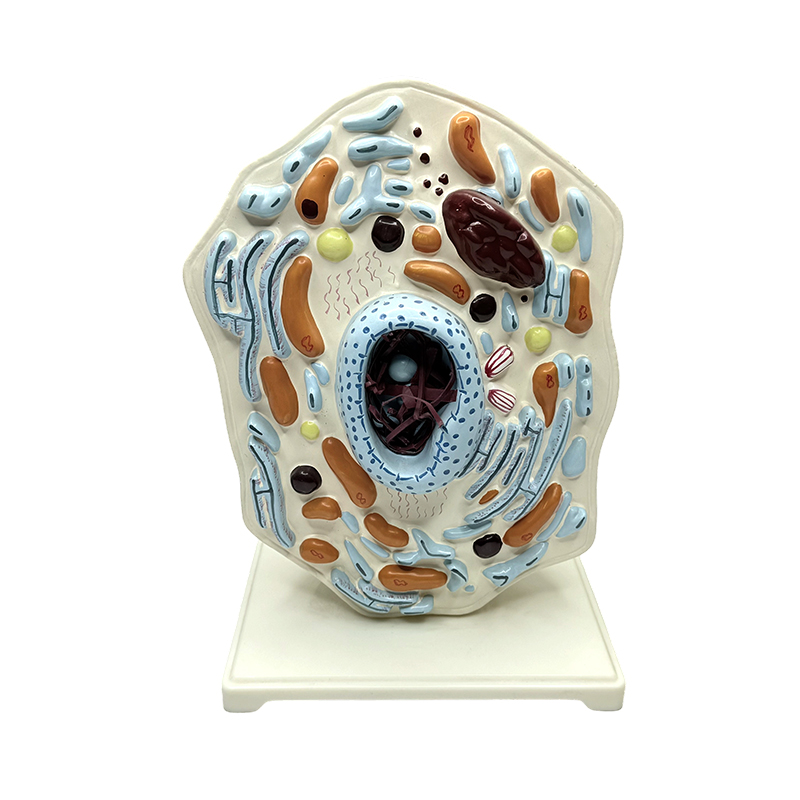 Enlarged Animal Cell Model with Removable OrganellesA detailed animal cell model featuring color-coded organelles like the nucleus and mitochondria. It helps students visualize cell structure in 3D, providing a tangible foundation before moving to digital animations.View Product →
When you later switch to a digital animation, the model gives students a spatial anchor to build on. For that reason, most lab managers treat physical models as a core purchase and digital tools as a complement, not a replacement.
Model budgets are finite, and replacements arrive less often than teachers would like. Smart planning starts with the syllabus.
For a closer look at how to make existing instruments work harder in your lessons, this practical guide to using biology teaching instruments effectively covers classroom techniques that go beyond the models themselves.
Use this checklist before you approve any model order.
Joints and hinges matter more than most buyers expect. A knee joint model with robust straps and clearly marked ligaments, for example, survives years of classroom use and makes tendon and ligament lessons dramatically easier to explain.
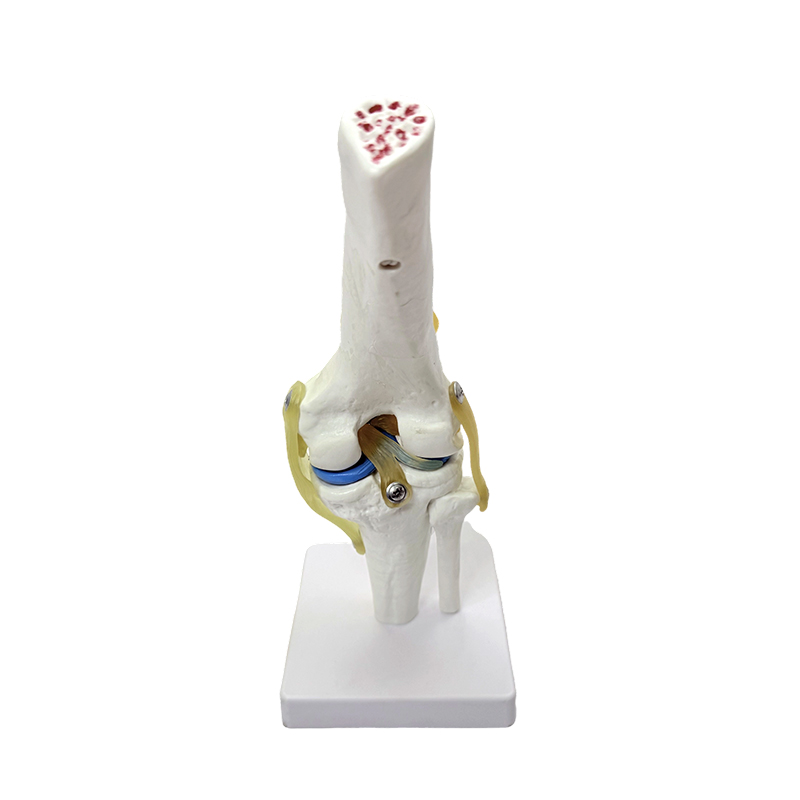 Natural Large Knee Joint Model with LigamentsThis knee anatomy model shows bones and ligaments, allowing demonstration of bending and rotation. Its sturdy construction suits repeated classroom use, clarifying tendon and ligament lessons for students.View Product →
For a standard middle or high school biology lab, start with one good torso model, one skeleton, one heart, and one animal cell model. That covers the most frequently taught units. Add kidney, eye, ear, plant, and animal models as the budget allows.
Medical-grade models show surgical detail and are built for clinical training. Teaching models simplify structures to match the curriculum. For most schools, a teaching model is the right choice — it costs less and is easier for students to read.
Wipe PVC and resin models with a soft damp cloth and mild detergent. Avoid alcohol and solvents. Store models in cabinets away from direct sunlight, and keep detachable parts in labelled bags so they do not disappear between lessons.
Models cannot fully replace dissection where dissection is a stated curriculum outcome. But many schools now use models for most structure lessons and reserve dissection for a single senior-level exercise. Models give every student equal access to the material, which dissection does not.
The best biology teaching model is the one that actually gets used. It sits at the right height on the shelf, matches the lesson plan, and survives a decade of curious hands. When you are ready to compare options for your next lab order, talk through your requirements with a supplier that can provide the full range of biology teaching equipment, from basic animal cell models to full-size human anatomical models. A short conversation with the right supplier saves far more time than a season of browsing catalogues.
Recommended Products


+86-18630650508 +86-0574-62500588

+8618630650508

 No. 588, Chaoyang South Road, Ditang Street, Yuyao, Ningbo City, Zhejiang Province, China


 English
 русский
 Español